
Growing Instructions
Growing Instructions MiniChamp Growing Kits
On this page you will find all growing instructions for MiniChamp growing kits conveniently together. Whether you start with a mushroom growing kit, oyster mushroom growing kit, shiitake growing kit or a Lion’s Mane growing block, you go through the same logical phases step-by-step: preparation, activation (temperature/moisture), daily care and multiple harvests.
With the white and brown mushroom growing kits, you will learn to work with grow-through compost and casing soil. You’ll see how to build up the temperature, use the lid’s vents and use our icons to track exactly when to mist and harvest for 2-5 nice flushes.
The oyster mushroom growing kits (yellow, gray and king) show in clear illustrations how to make cuts in the bag, activate the substrate and why daily spraying is so important for full, fleshy clusters. Thanks to the separate explanations for 3L and 7.5L grow kits, you get maximum yield from each size.
For the shiitake growing kits, we explain the complete process: bag removal, block tanning, 24-hour cold immersion bath, daily care and the rest periods between flushes. This allows you to harvest your own shiitake for up to several months at a time.
All steps are translated into clear icons in one calm style, so that beginners and advanced growers alike can see at a glance what to do. This is how to make every MiniChamp growing kit a success and make growing your own mushrooms at home easy, fun and extremely tasty.
Cultivation Instructions: White & Brown Mushroom Grow Kit
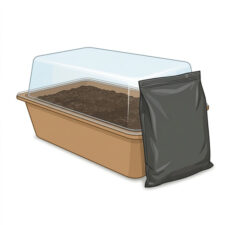
What's in the package?
The contents consist of grown-through compost and a bag of casing soil. Remove the bag of casing soil from the package and store it in a cool place.
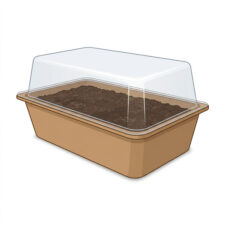
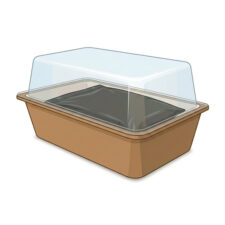
Day 1-4: Mycelial growth (20-25°C)
Place the container with the plastic lid on + 4 days at a temperature of 20-25°C.
After 4 days, the compost will be white through-grown with mold (mycelium)
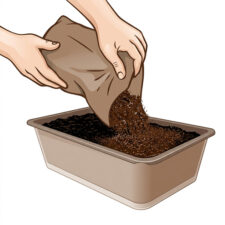
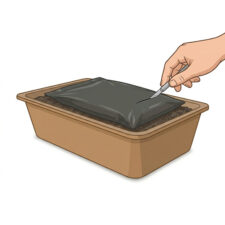
Day 5: Apply coating
Puncture 10 holes per side in the cover earth bag. Soak for 30 min in 0.5L to 2L of water:
- 3L culture kit: Soak 30 min in 0.5L water.
- 7.5L culture kit: Soak 30 min in 1L of water.
- 15L culture kit: Soak 30 min in 2L of water.
Then spread loosely over compost.
Day 5-12: Ingrowth casing soil (20-25°C)
Close lid and set for 5-8 days 20-25°C. Check mycelium
For the 7.5L and 15L: remove round lid

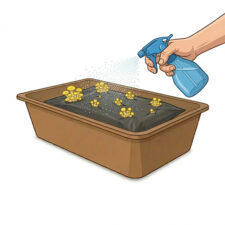
After Day 12: Pinning & Cooling Phase (15-18°C)
Place cool (15-18°C). Mist daily against dehydration. Water at buds.
- 3L:
Keep lid closed - 7.5L/15L:
Impression corners + open short-side holes for extra ventilation.
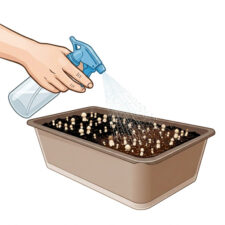
Watering when budding occurs
When a good number of buds are visible, water with a watering can. The casing soil should be kept moist but not too wet.
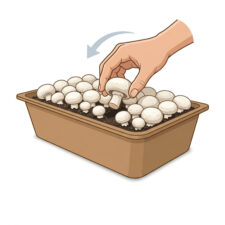
Harvesting: Step-by-step
- The first mushrooms appear on the sides, then in the middle
- Take a mushroom between fingertips and gently twist out
- Never pull it out! And do not harvest too small
- Water regularly against dehydration
Second & Third Harvest
After harvesting all mushrooms: water again. After about a week, new mushrooms will appear. This process can be repeated up to three to six times.
💡 Important Tips
- Temperature: 20-25°C incubation, 15-18°C fruiting
- Humidity: spray daily, never soggy
- Harvesting: turning, not pulling!
- Yield: 3-6 harvest cycles possible
Good luck and have a tasty meal! 🍄
Cultivation instructions: Oyster mushrooms
Step 1: Check mycelium (20-25°C)
Open container: substrate must be white grown through. If not? Seal and wait 10-14 days 20-25°C (leave plastic around substrate).

Step 2: Slices & Activation
Make 5 2-3 cm slices in the plastic. Pour ¼ liter of water for moist top. Place with lid at 20-25°C.
Step 3: To fruiting phase (10-15°C)
After +- 2 weeks: white buds visible.
- 3L: Keep the lid on.
- 7.5L: Press in corners + remove round + replace lid
Place in daylight (no direct sunlight), 10-15°C.
Step 4: Daily maintenance
Spray top once a day (not too wet).
From buds grow "oyster mushroom clumps" (stalks with gray dots). Keep spraying!

Step 5: Harvesting
Total duration: up to 3 months.
- Turn out whole lump at once (leave no leftovers)
- Cut 1 cm below slats
- Tougher stems: for soup/sauces
Repeat (3 cycles)
Make 5 new cuts in other places. Repeat from Step 2.. Max 3 harvests!
Second & Third Harvest
After harvesting all mushrooms: water again. After about a week, new mushrooms will appear. This process can be repeated up to three to six times.
💡 Important Tips
- T°: 20-25°C start | 10-15°C growth
- Light: Daylight (no sun)
- Spraying: Daily, slightly moist
- Harvest: Whole root ball, not pieces
Good luck and have a tasty meal! 🍄
Cultivation instructions: Shiitake
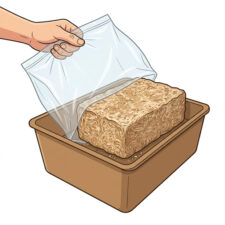
Step 1: Ripening in Daylight
Remove the plastic bag from the shiitake substrate block and leave the block in the tray/box.
Place the set in daylight, preferably on a north-facing windowsill, not in direct sunlight.
Leave the block for a few weeks until about 50% of the surface has turned brown.
Now place the lid:
3.5L: clear plastic lid on the tray.
7.5L: put cardboard lid on the box after pressing the corners, opening the air holes on the short sides and removing the inner round on top.

Step 2: Cold Water Immersion Bath (24 hours)
Fill a bucket or container with cold tap water and completely submerge the block for about 24 hours.
Place a clean, heavy object on top of the block to keep it submerged.
Are mushrooms already visible on the set?
If so, you may skip this submersion step for that flush.
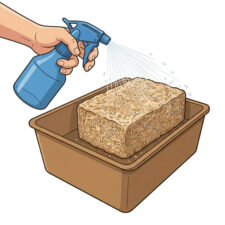
Step 3: Reset & Daily Spraying
Remove the block from the water and place it back in the container or box with the appropriate lid.
Replace the set in a bright, cool place (preferably the same window sill).
Spray the growing set at least 1× daily with a plant sprayer to prevent dehydration; the outside may be moist but not soaking wet.
In the following days, small shiitake buds will appear and grow into mushrooms with a cap diameter of about 4-8 cm.
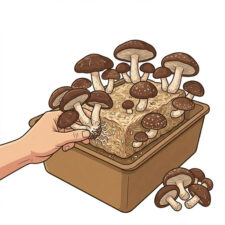
Step 4: Harvesting
The harvest period lasts about 1 week.
Harvest when the hats are nicely developed (4-8 cm).
Cut or twist the mushrooms away at the base of the stalk.
Use the hats as the main product; the somewhat tougher stems are ideal for broths, soups and sauces.
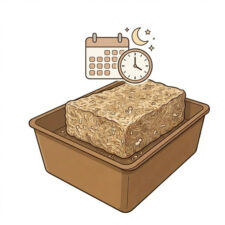
Step 5: Rest Period & New Flushes
After harvesting, the block needs a rest period of at least 15 days.
Remove the set from the window sill and put it in a place that is not too dry and not too warm, such as a cool cellar.
After this rest period, you can repeat the cycle:
return to Step 2 (immersion bath) and go through the steps again.
Within about 5-10 days after the immersion bath, the 2nd harvest period follows.
For up to 6 months, you can harvest 5-8 times like this, depending on care and conditions.
💡 Important Tips
- Avoid direct sunlight; indirect daylight is ideal.
- Never allow the block to dry out completely, but avoid standing water.
- Cool, light and moist = best conditions for beautiful shiitakes.
- Yield: 5-8 harvest cycles possible
Good luck and have a tasty meal! 🍄